DIY climbing walls are an excellent way to bring the thrill of rock climbing right into your backyard or home. Not only is it a fantastic way to get a great workout, but building a DIY climbing wall is also a fun and rewarding project for anyone with a little bit of handyman experience. From simple bouldering walls to full-fledged climbing structures, the possibilities are endless, and the level of difficulty can be adjusted to suit your skill and budget.
This guide will walk you through every step of the process, from planning and design to construction and safety considerations. We’ll provide detailed instructions, material lists, and tips for creating a safe and enjoyable climbing experience.
Planning and Design
Planning and designing your DIY climbing wall is an exciting step, involving key decisions that will shape your climbing experience. You’ll need to consider factors like location, size, and design elements to create a safe and enjoyable climbing space.
Choosing the Right Location and Size
The location and size of your climbing wall are crucial for its practicality and functionality. You’ll need to assess your space and ensure it meets your climbing goals and safety requirements.
- Available Space: Determine the amount of space you have available, considering both the wall’s dimensions and any surrounding obstacles.
- Wall Orientation: Consider the direction of sunlight and its impact on the wall’s surface temperature. Ideally, you want a wall that doesn’t receive direct sunlight for extended periods, especially during hot weather.
- Accessibility: Ensure easy access to the climbing wall for setup, maintenance, and use.
- Ceiling Height: The height of your ceiling will dictate the maximum height of your climbing wall. For a beginner-friendly wall, a height of 8-10 feet is sufficient. For more advanced climbers, you might consider a wall that reaches up to 12-15 feet.
Designing a Climbing Wall Layout
Designing the layout of your climbing wall is a creative process that allows you to tailor it to your preferences and climbing goals.
- Hold Placement: The placement of holds will influence the difficulty and style of climbing routes. Consider incorporating a variety of holds, including jugs, pockets, slopers, and crimps, to provide a diverse climbing experience.
- Angles and Features: Adding angles and features to your wall, such as overhangs, roofs, and dihedrals, can add complexity and challenge to your climbing routes.
- Route Setting: Consider creating different route types, including beginner-friendly routes, intermediate routes, and advanced routes.
Budget Breakdown
Creating a budget breakdown for your DIY climbing wall will help you stay on track with your expenses and ensure you have the necessary materials and tools.
| Item | Estimated Cost |
|---|---|
| Plywood (4×8 sheets) | $20 – $30 per sheet |
| Climbing Holds | $5 – $15 per hold |
| T-Nuts and Bolts | $10 – $20 per pack |
| Safety Mat | $50 – $100 |
| Tools (drill, saw, level, etc.) | $50 – $100 |
Construction Process
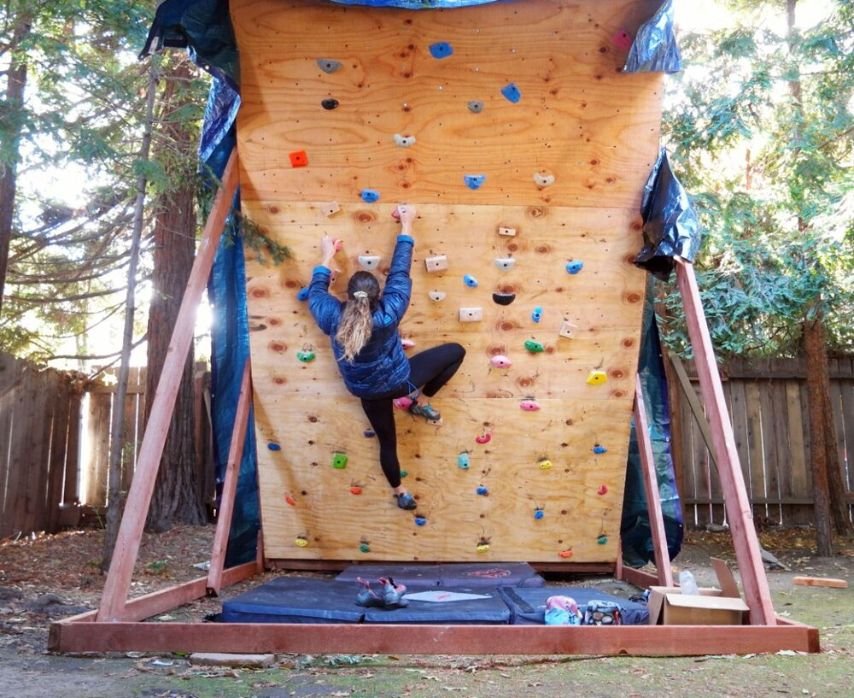
The construction process of a DIY climbing wall is an exciting step where you bring your design to life. This section will guide you through the process of building the wall, ensuring safety and durability.
Framing the Wall
Framing the wall provides the structural support for your climbing wall. It’s essential to choose the right materials and techniques for a sturdy and safe structure.
- Choose the right lumber: Opt for pressure-treated lumber for the base and studs to withstand moisture and potential weathering. Use 2×4 or 2×6 lumber depending on the size and height of your wall.
- Cut the lumber: Measure and cut the lumber accurately using a saw. Ensure all cuts are precise to create a stable and square frame.
- Assemble the frame: Connect the lumber pieces using wood screws or construction adhesive. Secure the frame to the wall or floor using anchors and screws.
- Add bracing: Install diagonal bracing to reinforce the frame and prevent warping. This is particularly important for larger or taller walls.
Sheathing the Wall
Sheathing the wall provides a smooth and consistent surface for attaching the climbing holds and safety features.
- Choose the right sheathing: Use plywood, OSB, or another type of sheathing that is durable and moisture-resistant. Consider using a thicker sheathing for larger walls to ensure stability.
- Attach the sheathing: Secure the sheathing to the frame using screws or nails. Ensure the sheathing is flush and level for a smooth climbing surface.
Installing Climbing Holds
Climbing holds are the essential elements that provide grip and challenge for climbers.
- Choose the right holds: Select holds of different shapes, sizes, and difficulty levels to create a varied and challenging climbing experience. Consider using a mix of plastic and wooden holds for different textures and challenges.
- Position the holds: Plan the hold placement based on the desired climbing routes and difficulty levels. Consider the spacing and angles of the holds to create interesting and challenging routes.
- Install the holds: Use specialized hold installation screws or epoxy to attach the holds to the sheathing. Ensure the holds are securely attached and aligned correctly.
Adding Safety Features
Safety features are crucial for protecting climbers and ensuring a safe climbing environment.
- Install a top-rope anchor: A top-rope anchor is a secure point at the top of the wall where climbers can attach their ropes. Use a strong anchor system that meets safety standards.
- Install a belay station: A belay station is a secure area where the belayer can stand and control the rope. Ensure the belay station is located in a safe and stable area.
- Install a crash pad: A crash pad provides a soft landing surface for climbers in case of falls. Choose a crash pad that is thick and durable enough to absorb the impact of a fall.
Finishing Touches
After installing the climbing holds and safety features, add finishing touches to enhance the look and functionality of your climbing wall.
- Paint the wall: Paint the wall with a durable and non-slip paint to create a visually appealing and safe climbing surface.
- Add lighting: Install lighting to ensure good visibility for climbers, especially during evening or night climbing sessions.
- Create a climbing area: Set up a designated area for climbing, including a space for the belayer and crash pad.
Wall Finishes and Aesthetics
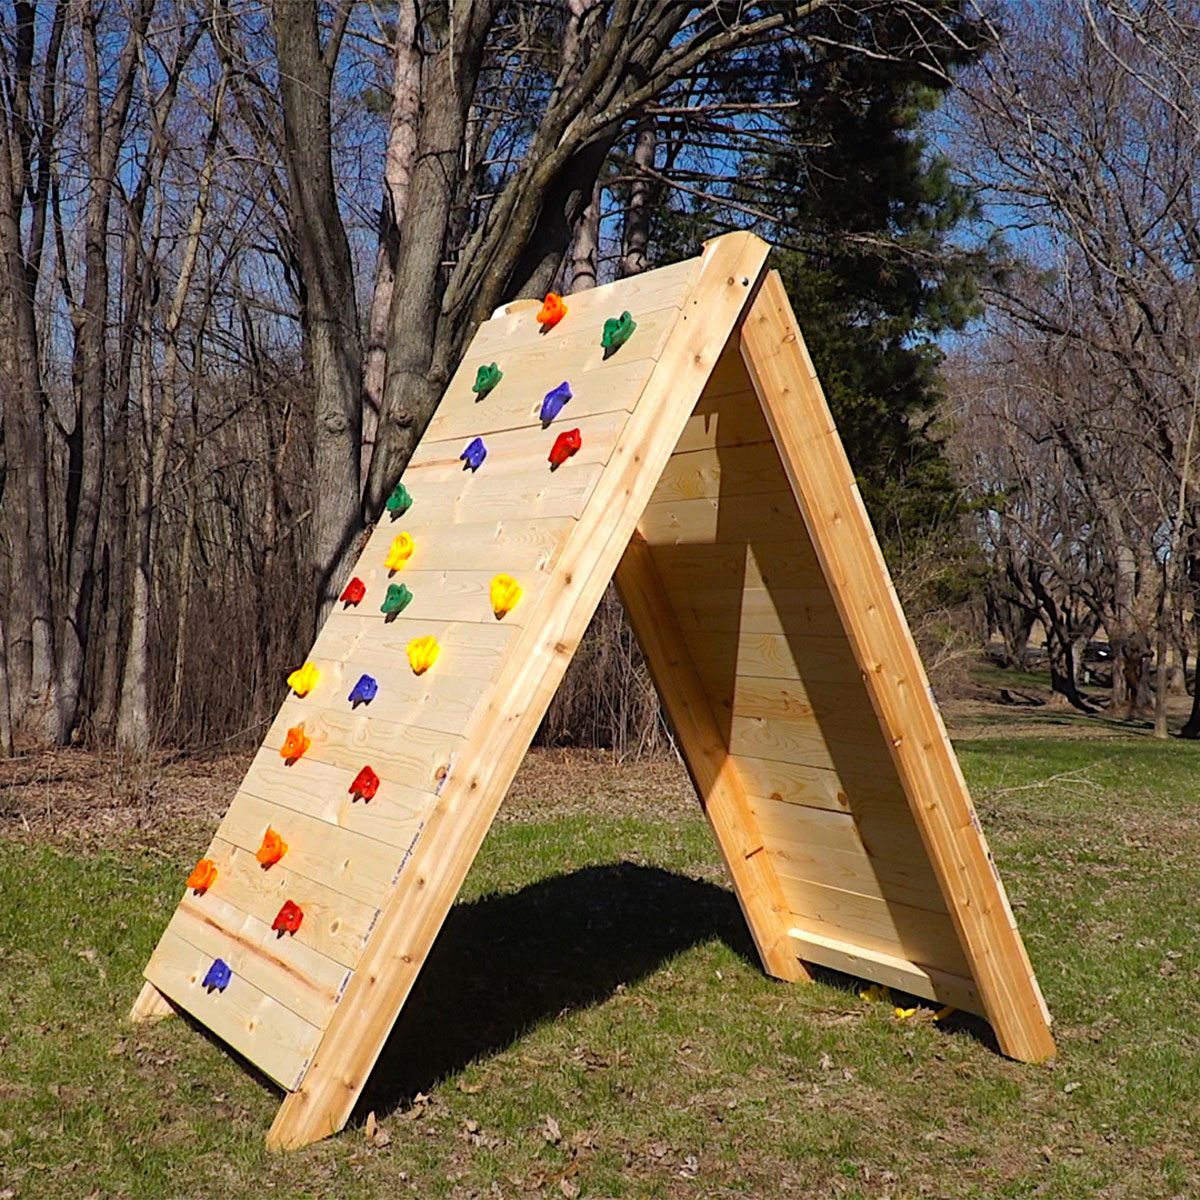
Once your climbing wall frame is built and the holds are installed, the next step is to give it a durable and aesthetically pleasing finish. The right finish will protect your wall from wear and tear, enhance its visual appeal, and create a climbing experience that’s both functional and fun.
Applying Paint, Epoxy, and Other Protective Coatings
Applying a protective coating is crucial for extending the life of your DIY climbing wall and making it look great. Here’s a breakdown of the common options and their application methods:
- Paint: Acrylic latex paint is a popular choice for climbing walls. It’s durable, water-resistant, and comes in a wide range of colors. Apply two coats of paint for optimal coverage and durability.
- Epoxy: Epoxy coatings offer superior durability and abrasion resistance compared to paint. They are particularly suitable for high-traffic areas or walls that will be exposed to heavy use. Apply epoxy according to the manufacturer’s instructions, which typically involve mixing two parts (resin and hardener) and applying multiple coats.
- Other Protective Coatings: You can explore other specialized coatings like polyurethane or acrylic-based sealants, depending on your specific needs. These coatings can provide additional protection against moisture, UV rays, and other environmental factors.
For a more textured surface, consider adding a layer of textured paint or a non-slip additive to the epoxy coating.
Adding Decorative Elements
Personalizing your climbing wall with decorative elements can add a unique touch and make it more visually appealing. Here are some ideas:
- Wallpapers and Murals: You can apply themed wallpapers or create custom murals to enhance the visual appeal of your climbing wall.
- Stencils: Use stencils to create patterns or designs on your wall.
- Lighting: Strategically placed lighting can highlight the climbing wall and create a dramatic effect.
- Plants: Adding plants around your climbing wall can bring a touch of nature indoors and enhance the overall aesthetics.
Climbing Training and Progression
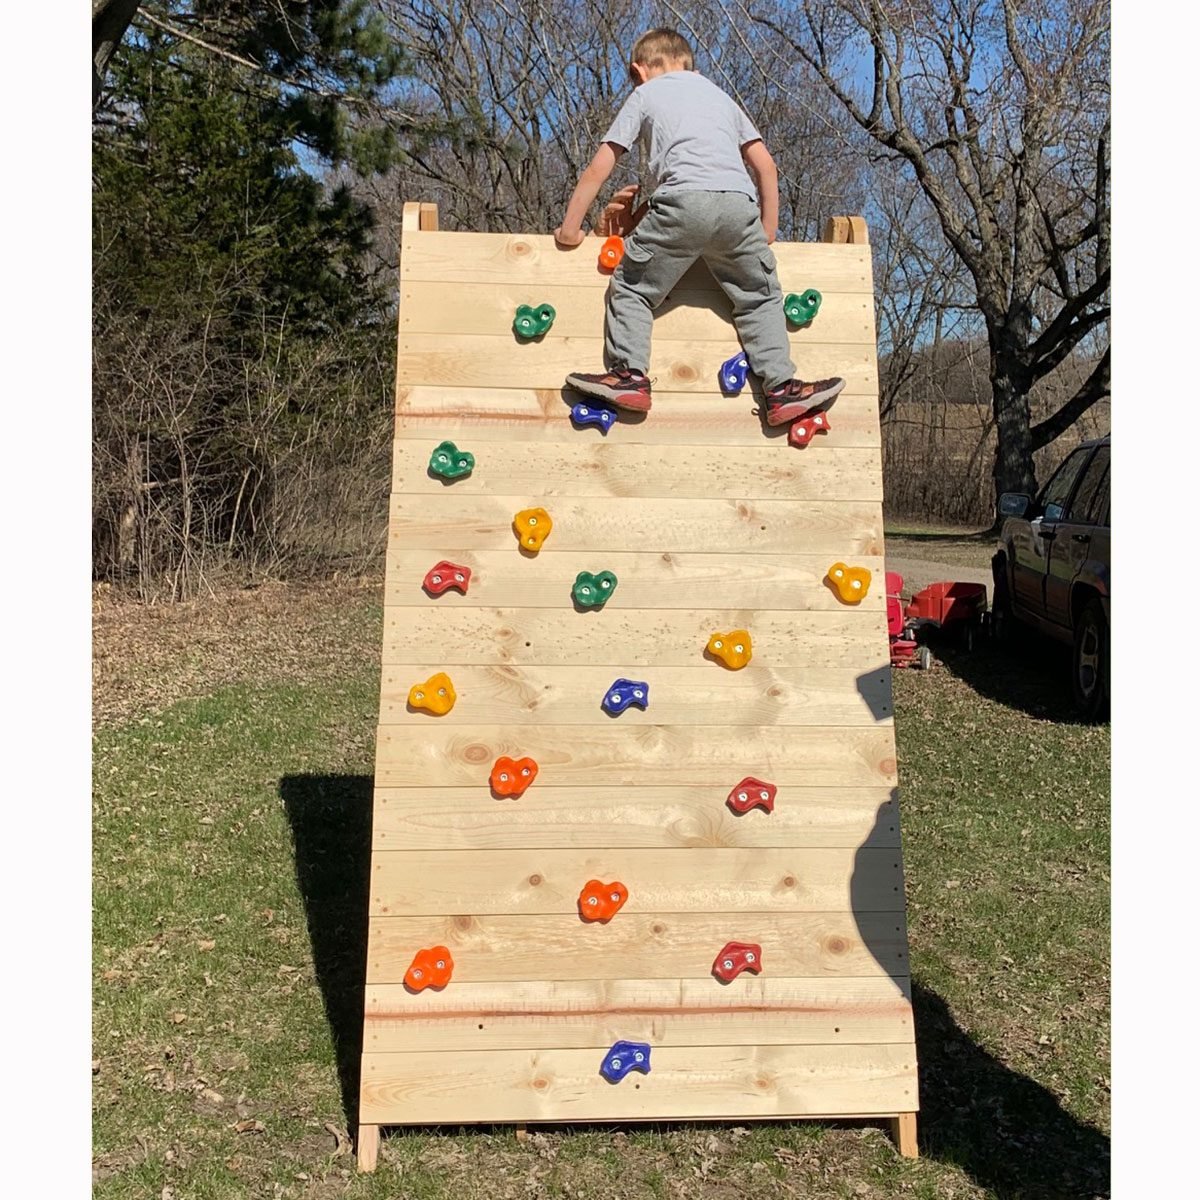
A DIY climbing wall presents an excellent opportunity to enhance your climbing skills and fitness. It allows you to practice regularly and tailor your training to your specific goals and abilities. This section will guide you on developing a training plan, improving technique, strength, and endurance, and understanding the importance of proper warm-up and cool-down routines.
Developing a Training Plan
A well-structured training plan is crucial for consistent progress. It should incorporate a variety of exercises targeting different aspects of climbing, such as strength, endurance, and technique.
- Frequency: Aim for at least two to three climbing sessions per week, allowing for adequate rest and recovery between sessions.
- Duration: Start with shorter sessions and gradually increase the duration as your fitness improves. A typical session could last between 1.5 to 2 hours.
- Variety: Incorporate different types of climbing, including bouldering, top-roping, and lead climbing, to challenge different muscle groups and improve your overall climbing ability.
- Progression: Gradually increase the difficulty of your routes or problems as you progress. This could involve trying routes with more holds, steeper angles, or more challenging moves.
- Rest and Recovery: Allow for adequate rest and recovery between training sessions. This is essential for muscle repair and growth, and it can help prevent injuries.
Improving Climbing Technique
Proper technique is fundamental to climbing efficiently and safely. It allows you to conserve energy, minimize strain on your body, and climb more challenging routes.
- Footwork: Focus on precise footwork, using your feet to generate power and maintain balance. Practice placing your feet in the most advantageous positions for each move.
- Body Positioning: Maintain a relaxed and balanced posture, keeping your core engaged and your body close to the wall. Avoid unnecessary twisting or reaching.
- Hand Placement: Choose holds strategically, focusing on maximizing grip strength and stability. Experiment with different handholds and positions to find what works best for you.
- Dynamic Movement: Practice dynamic movements, such as jumps and reaches, to improve your agility and coordination. This will help you overcome challenging sections on routes.
- Route Reading: Develop your route reading skills by analyzing the sequence of holds and moves before starting a route. This will help you plan your ascent and anticipate challenges.
Improving Strength and Endurance
Strength and endurance are essential for climbing. Building strength allows you to hold onto holds for longer periods, while endurance enables you to climb for extended periods without fatigue.
- Strength Training: Incorporate strength training exercises that target the muscles used in climbing, such as pull-ups, chin-ups, rows, and core exercises.
- Endurance Training: Engage in endurance activities such as long climbs, repeated ascents of easier routes, or interval training to build stamina.
- Fingerboard Training: Use a fingerboard to strengthen your fingers and forearms. Start with easier holds and gradually increase the difficulty as your grip strength improves.
Warm-up and Cool-down Routines
Proper warm-up and cool-down routines are crucial for preventing injuries and optimizing performance.
- Warm-up: A thorough warm-up prepares your muscles for climbing by increasing blood flow and flexibility. It should include light cardio, dynamic stretches, and climbing-specific exercises like footwork drills and easy climbs.
- Cool-down: A cool-down helps your body recover from the exertion of climbing. It should include static stretches, focusing on the major muscle groups used in climbing, such as the shoulders, back, legs, and forearms.
Advanced DIY Projects: Diy Climbing Wall
Taking your climbing wall to the next level requires exploring unique features and incorporating advanced design elements. These projects will enhance the challenge and enjoyment of your climbing experience, offering more variety and complexity.
Designing Unique Features, Diy climbing wall
Unique features can transform a simple climbing wall into a more engaging and challenging climbing environment. These features provide opportunities for diverse climbing styles and foster creativity in route setting.
Bouldering Cave
A bouldering cave offers a unique climbing experience by simulating a natural cave environment. It provides a more enclosed and intimate setting, allowing climbers to focus on technical movements and problem-solving.
- Structure: A bouldering cave can be constructed using plywood or other sturdy materials. The shape can be designed to resemble a natural cave, with rounded edges and varying heights. A small opening provides access to the cave, while the interior can be equipped with holds and features for bouldering.
- Lighting: Consider incorporating dimmable lighting within the cave to create an atmospheric and challenging environment. LED strips or spotlights can be used to illuminate specific areas and create interesting shadows. The lighting can be adjusted to match the mood and difficulty of the climbing session.
- Holds: Use a variety of holds to create different climbing challenges within the cave. Include holds with varying shapes, sizes, and angles to encourage creativity and problem-solving.
Traversing Wall
A traversing wall provides a horizontal climbing experience, allowing climbers to move sideways across the wall. This type of wall can be incorporated into a larger climbing structure or built as a standalone feature.
- Structure: A traversing wall can be constructed using plywood or other sturdy materials. The wall can be designed with a slight incline or a horizontal surface, depending on the desired level of difficulty. The length of the wall can be customized to suit the available space.
- Holds: Use a variety of holds to create different traversing routes. Include holds with varying shapes, sizes, and angles to encourage creativity and problem-solving. Consider incorporating holds that are specifically designed for traversing, such as “rail” holds that allow climbers to move sideways along the wall.
- Safety: Ensure that the traversing wall is securely anchored to the supporting structure. Provide adequate padding underneath the wall to protect climbers in case of falls.
Closing Summary
With a little planning, effort, and a dash of creativity, you can transform your space into a personal climbing paradise. Whether you’re a seasoned climber looking for a new challenge or a beginner eager to explore the world of vertical adventure, building a DIY climbing wall is a project that will provide endless hours of fun and fitness. So, grab your tools, gather your materials, and get ready to climb!
Building a DIY climbing wall is a fantastic way to get a workout at home and challenge yourself. Before you start, however, it’s essential to make sure you have all the necessary tools and materials, and if you’ve accidentally deleted any crucial files while planning, you might find Recuva Portable to be a lifesaver.
Once you’ve got everything sorted, you can start creating your own personalized climbing wall, adding different holds and challenges to suit your skill level and preferences.

